I thought I would share a variety of projects I’ve worked on lately. First up are these fun clothespin magnets I made using dollar store clothespins, acrylic paint, a yoyo maker, Mod Podge, button, pearl beads and a glue gun. The project went together lickity split and they are packaged in a way that would make a great gift for a teacher, friend or neighbor. Notice the twisty tie is handmade also and matches the paper on the clothespins.
I’ve seen a few decorated clothespins of late but wanted to put my own spin on them, so I took matters in my own hands and this is the result. First I took the clothespins apart and painted the entire wood part with acrylic paint. The top of the paper was first sealed with Mod Podge with just one layer to make it a bit more durable. I adhered the clothespins to the paper with Mod Podge and then applied a thin coat over everything. After the Mod Podge dried, I took a craft knife to trim away the excess paper. I then put the clothespins back together and went onto making the fabric yoyo. My yoyo’s were made with my Clover Yoyo Maker and a few scraps of fabric left over from my quilted tote bag. My trusty glue gun was used to adhere the yoyo to the front of the clothespins (now turned refrigerator magnet). A button and a few beads were added to the top for a little more pizzazz, and magnets were added to the back with my glue gun to finish the project.
Twisty ties are really easy to make. I saw a tutorial by Leanne over at Organize and Decorate Everything recently and thought they were a great idea. However, I thought the paper may rip when being twisted on the bag, so I added a layer of Mod Podge on the front of the paper to make it a bit more durable and set it aside to dry. By adding that light layer of Mod Podge, the tie twisted without tears and I was very happy with the result. Paper was cut into 1/4″ strips and about 5″-6″ long and red tape was used on the inside of one of the strips. Next I placed a piece of wire down the center of the taped paper and added the second layer of paper and voila’, the twisty tie was complete. Cute beyond words, wouldn’t you say?
Next up is this pretty tulip card I made. Inspiration for this card came from All Things Paper, and if you are a paper lover then you will absolutely, positively love this blog. The creations and projects from Ann are beyond amazing. So when I was looking for a card depicting Spring, I had to look no further than Ann’s blog for inspiration. Ann’s card was made for Valentine’s Day, but I decided to make the tulips in a pastel color for my project. Each tulip was made using a few quilling strips and a green strip was run through my crimping tool to add just a hint of dimension and to anchor the flowers. My polka dots embossing folder from Cuttlebug was used on the white cardstock and I used a Fiskars border punch for the upper and bottom edges. Two pearls were added on each side of the white embossed sentiment and the card was complete. I really love how this card turned out, and my desire for a Spring-like card was achieved. Inspiration from Ann’s card, but changed up to make it my own. Thanks to Ann for her beautiful blog and inspiration.
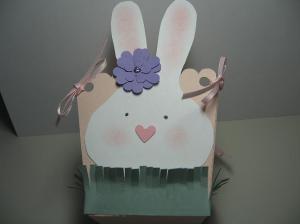
Last but not least is this cute bunny Easter basket. A shape I downloaded from the Silhouette store was used for the box and a very, very old template from Stampin’ Up! was traced and cut out for the bunny. Several paper punches, Stickles, chalk, ink and ribbon were all used to give this bunny her cuteness and Martha Stewart fringe scissors was the perfect solution to make the grass. I think this turned out quite nice.
Well that’s it for today. Enjoy your day and God Bless.
Linda


